
3D PRINTED AIRCRAFT
PROJECT TIMEFRAME
Summer 2018 - Present
PROJECT PURPOSE
To discover and test novel design and printing techniques in order to enable additive manufacturing of flyable small UAS airframes.
TECHNIQUES USED
-
Conceptual and detail design
-
CAD modeling
-
Programming in Arduino & C/C++
-
ArduPilot configuration and tuning
SKILLS LEARNED
-
Mixing surface and solid modeling
-
Mass saving design methods
-
Novel slicing techniques
-
Video and written documentation
The first stage of this project was learning. Printed PLA plastic is not an intuitive material to build airplanes with - it's brittle and very dense. Traditional design techniques just don't apply.
Fortunately, I wasn't the first to experiment in this space. I bought some digital plans for printable hobby model aircraft and started building to learn their secrets.

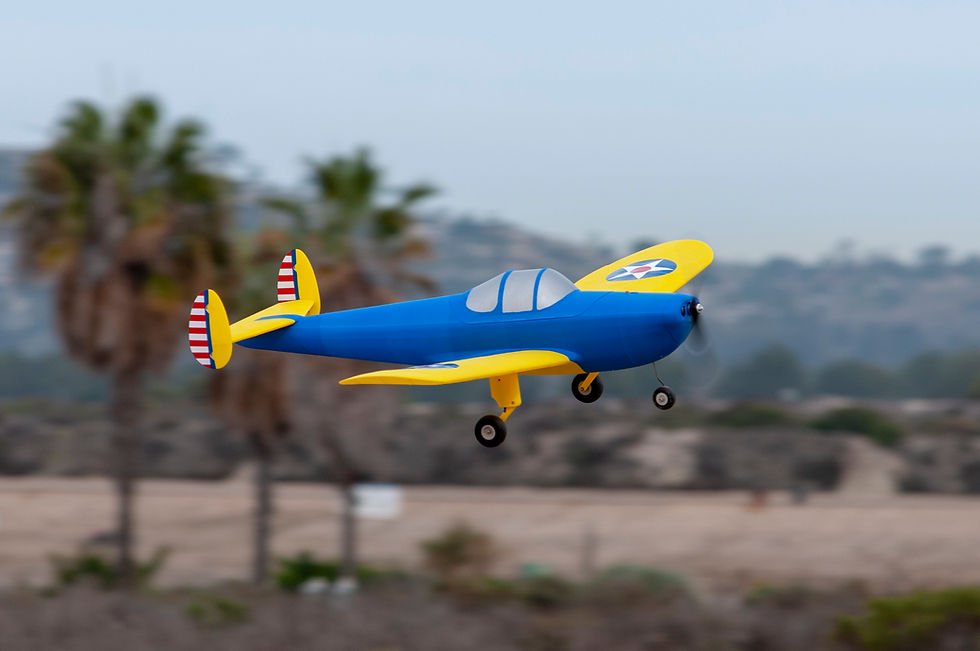
The first aircraft I chose to model myself was an Ercoupe - a simple configuration with lots of wing area and benign flight characteristics. CAD design for printed models is a chore, as thin solid internal structures must be carefully arranged inside zero-thickness outer skins. Plus, print orientation must be considered for every feature of every part.

The upside of the lengthy design time is shortened build time. 3D printers don't care how complex each part's internal structure is, and all it takes is a bit of glue to stack them all together. The Ercoupe build went quickly, and making duplicates is as easy as running the print jobs over again.

After some successful flights, I wrote a build guide and published the design online as a digital download. One of the great benefits of 3D printing for aircraft is that the designs can be distributed for reproduction anywhere - no supply chain, shipping, or material constraints.
My next subject was a sport jet model loosely based on the XQ-58A Valkyrie loyal wingman demonstrator. This would allow me to learn how to apply modeling and printing techniques to considerably larger and more complex designs. It would feature ducted fan propulsion, retractable landing gear with doors, and a flight controller running ArduPilot firmware for autonomous flight.

Like the Ercoupe, the bulk of my effort was spent in the CAD design. The build still went relatively quickly - it just consisted of more parts.

The retractable landing gear and doors were one of the more intricate design features of the Valkyrie. I created a custom sequencer to handle the deploy and retracting events with the correct order and timing. It was designed in Eagle PCB, assembled by hand using hot air reflow tools, and programmed in Arduino. This was my first experience with SMT layout and assembly.


The Valkyrie became a successful flying model as well, and always draws attention at flying meets. Like the Ercoupe, I published the design online for digital download. It's been printed and assembled by other enthusiasts around the world.
These projects have given me confidence using the design techniques required to 3D print UAS airframes for a variety of future projects.
